
Export with custom settings
Change a setting when your printer asks for something a preset doesn't cover. On the New subtab of the Export tab, click + next to a section to turn it on, and − to turn it off. To export with a ready-made setup instead, see Export with a preset.
Exporting requires Print for Figma Pro. When your settings are ready, click Export.
Set file options
Choose the page order
Open Order Pages to choose the page order in a single PDF. Pages can follow their page number or name, or their position on the canvas:
- By Page Number / Name (default) sorts by layer name, so "Page 2" comes before "Page 10".
- Left to Right (Horizontal) follows the frames' positions on the canvas, left to right.
- Top to Bottom (Vertical) follows the frames' positions on the canvas, top to bottom.
Export one PDF or separate PDFs
Use Export As to choose the files you download.
- Single PDF (default) combines all pages into one PDF.
- Separate PDFs saves each page as its own PDF, named after its frame, and bundles them in a
.zipfile.
Convert colors
Figma designs are RGB. New to color modes? Read What are color modes? first. To convert in one click, use a print-ready preset.
Turn on color conversion
Click + next to Color Conversion to turn it on. Color Conversion starts on CMYK with the default ICC profile. Click − to turn it off and go back to RGB.
Choose a color space
Use Color Space to choose the colors in your exported PDF. Choose CMYK to see its extra options: ICC Profile and Custom Colors only appear for CMYK.
- CMYK (default) converts colors to CMYK with the ICC profile you choose. Most commercial printers ask for CMYK.
- RGB keeps Figma's RGB colors.
- Gray converts the PDF to grayscale.
Choose an ICC profile
Open the ICC Profile list and pick the profile your printer asks for. An ICC profile describes how a press, ink, and paper reproduce color, and it sets how your colors are converted.
If your printer doesn't name one, leave the default. It's FOGRA59, a general-purpose profile that loses very little color if your printer converts the file to their own.
All ICC profiles and their file names
Each profile in the list shows its file name in parentheses, so you can match the file your printer names.
| Group | Profile | File name |
|---|---|---|
| North America | GRACoL 2013, for sheetfed printing | GRACoL2013_CRPC6.icc |
| North America | GRACoL 2013 Uncoated | GRACoL2013UNC_CRPC3.icc |
| North America | SWOP 2013C3 | SWOP2013C3_CRPC5.icc |
| North America | SWOP 2013C5 | SWOP2013C5.icc |
| North America | GRACoL 2006 | GRACoL2006_Coated1v2.icc |
| North America | SWOP 2006 Grade #3 | SWOP2006_Coated3v2.icc |
| North America | SWOP 2006 Grade #5 | SWOP2006_Coated5v2.icc |
| North America | Generic CMYK | generic_cmyk.icc |
| Europe / International | FOGRA59 | eciCMYK_v2.icc |
| Europe / International | PSO Coated v3 [FOGRA 51] | PSOcoated_v3.icc |
| Europe / International | PSO Uncoated v3 [FOGRA 52] | PSOuncoated_v3_FOGRA52.icc |
| Europe / International | PSO Uncoated [FOGRA47] | PSO_Uncoated_ISO12647_eci.icc |
| Europe / International | FOGRA47 300% | Uncoated_Fogra47L_VIGC_300.icc |
| Europe / International | FOGRA47 260% | Uncoated_Fogra47L_VIGC_260.icc |
| Europe / International | ISO Coated v2 300% [FOGRA39] | ISOcoated_v2_300_eci.icc |
| Europe / International | ISO Coated v2 [FOGRA39] | ISOcoated_v2_eci.icc |
| Europe / International | FOGRA39 300% | Coated_Fogra39L_VIGC_300.icc |
| Europe / International | FOGRA39 260% | Coated_Fogra39L_VIGC_260.icc |
| Europe / International | Coated FOGRA39 | CoatedFOGRA39.icc |
| Japan | Japan Color 2011 | JapanColor2011Coated.icc |
| Japan | Japan Color 2001 Coated | JapanColor2001Coated.icc |
| Japan | Japan Color 2001 Uncoated | JapanColor2001Uncoated.icc |
| Japan | Japan Color 2002 Newspaper | JapanColor2002Newspaper.icc |
| Japan | Japan Color 2003 Web Coated | JapanColor2003WebCoated.icc |
| Japan | Japan Web Coated (Ad) | JapanWebCoated.icc |
Use custom colors
- Click + next to Color Conversion.
- Open Custom Colors.
- Choose a collection.
Color conversion converts your colors with an ICC profile. Custom colors let you choose the exact CMYK values for specific colors, such as a logo color your printer has matched before. They only apply to CMYK exports.
If you haven't made a collection yet, click Add Custom Colors to create one.
To create and edit collections, see Use custom CMYK colors.
Make a PDF/X file
Ask your printer which PDF standard they need before you export.
Turn on conformance
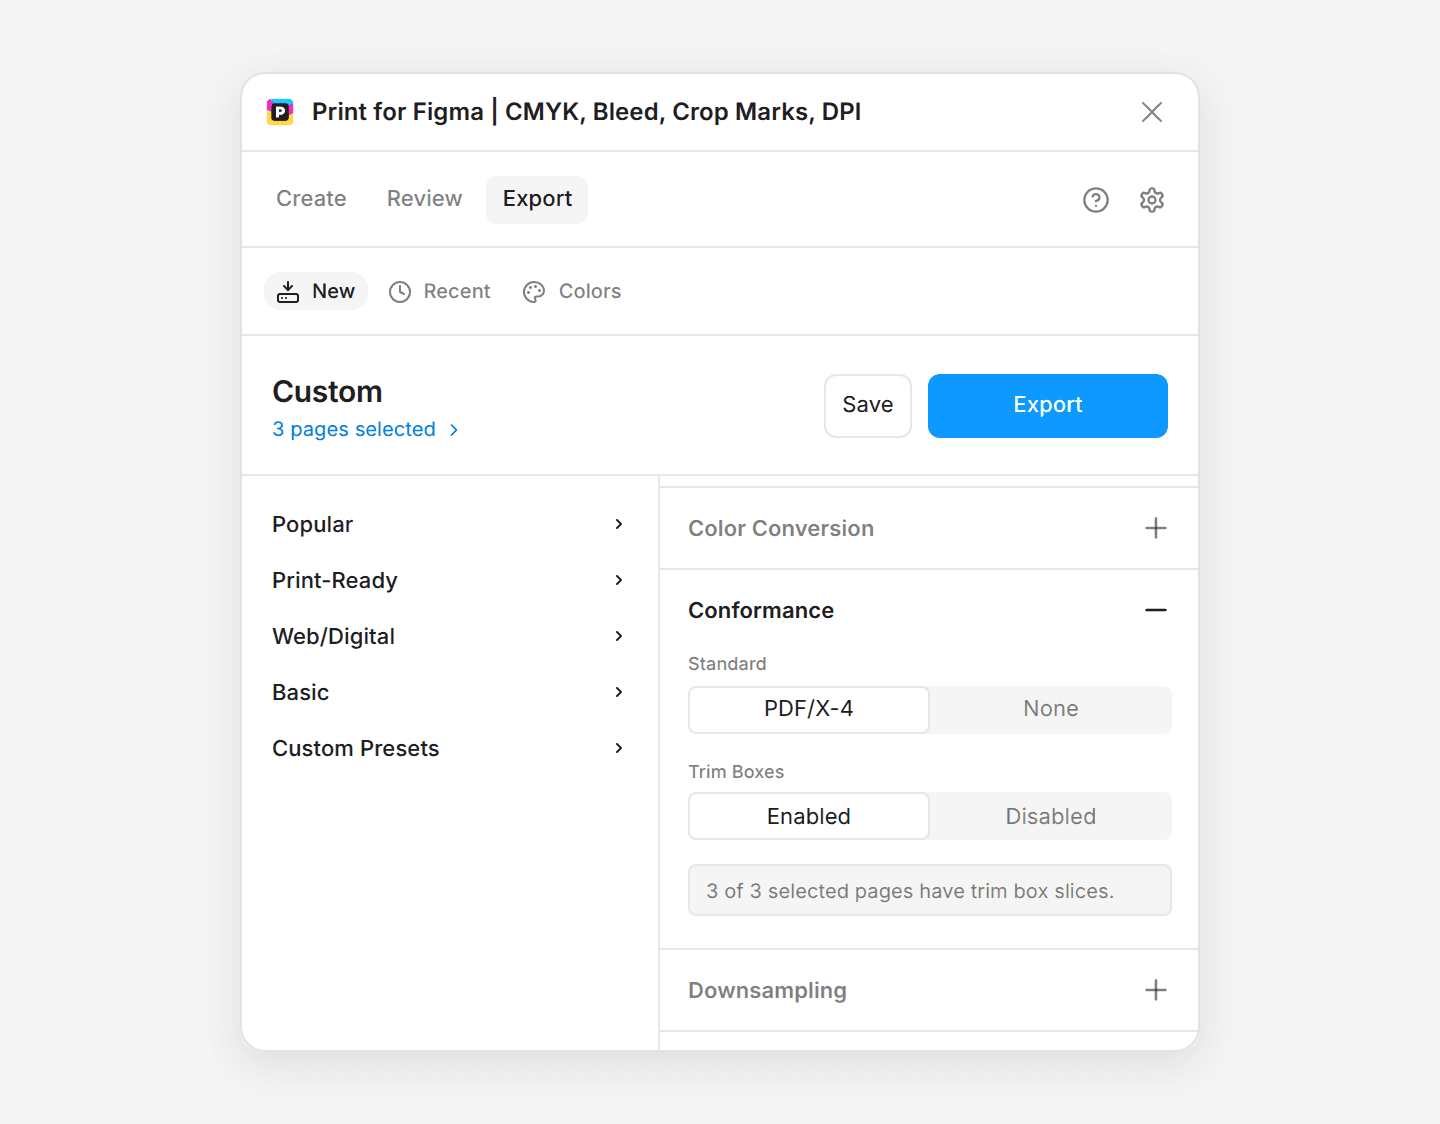
Click + next to Conformance to turn it on. Conformance starts on PDF/X-4 with Trim Boxes enabled, so your export is a PDF/X file. Click − to turn it off.
- Standard sets the PDF standard of your export. PDF/X-4 is an ISO standard PDF format made for print. None doesn't apply a standard.
- Trim Boxes marks the finished size of each page inside the PDF. It matters when your frame includes bleed or crop marks, so the page is bigger than the cut size. PDF/X-4 always includes trim boxes.
Mark the trim area with a slice
- In Figma, choose the Slice tool, then drag a slice inside your frame that covers the trim area, the part that's left after cutting. Figma's export article covers slices.
- Name the slice
Trimbox.
Select the frame again, and the plugin uses the slice as the trim box. Pages made by Print for Figma already include a locked Trimbox slice, so you only need to draw one for frames the plugin didn't create.
A note under Trim Boxes tells you whether the plugin found a slice on your selected pages. With no slice, the trim box matches the page size.
If the plugin doesn't find your slice
Name the slice Trimbox. Keep the slice inside the frame, and don't rotate the frame or the slice.
Crop to the trim box
Click Enabled under Crop to Trim Box to crop the PDF to just the final print area. Cropping is mainly for previewing the file, or for opening it in Illustrator.
Turn on Illustrator Compatibility
Click Enabled under Illustrator Compatibility to prepare the file for editing in Adobe Illustrator. Files are still exported as PDF.
Reduce image resolution
A large photo placed small in your design carries far more pixels than the print needs. Downsampling reduces those images so the PDF is lighter to upload and email.
Turn on downsampling
Click + next to Downsampling to turn it on. Click − to turn it off, and images keep their full resolution.
Maximum DPI is the highest image resolution allowed in the PDF. Images above it are downsampled. It starts at 300, the usual target for print. Lower values suit on-screen PDFs, where file size matters more than detail.
Downsampling only lowers resolution. It can't add detail to an image that's too small for print. Check your images with DPI before you export, and replace any that are too small for print. Preflight also flags images above 600 DPI, which add file size without a visible quality improvement.
To keep a setup you use often, see Save a custom export preset.
Was this helpful?
Let us know if this content was useful.